Share
Pin
Tweet
Send
Share
Send
For the New Year, we always prepare in advance - we buy gifts, souvenirs, prepare a festive menu, choose Christmas decorations or make them with our own hands.
We offer you a master class from our partner, the ARTform trademark, on the manufacture of balls for decorating the Christmas tree using decoupage and crackle technique.
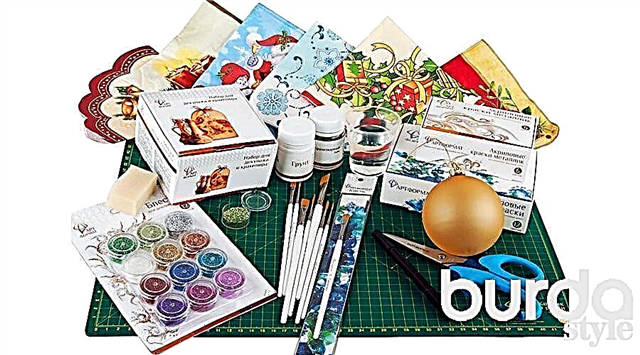
You will need:
Set for decoupage and craquelure. Acrylic paints (classic colors and metallic). Synthetic brushes flat number 12 and round number 1 form. Spangles for decoration. Scissors. Capacity with water. Paper napkins with New Year's motives. Christmas toy "Ball" plain and without decor. A piece of foam sponge. Wet wipes or paper towels.
 STEP 1
 We abundantly cover the ball with the soil from the decoupage set and craquelure using a flat synthetic brush No. 12. Apply the soil in two layers with an intermediate drying of each layer for about 30-60 minutes. Immediately after finishing work, the brush must be washed or put in a container of water.
Tip: using a regular hair dryer, you will speed up the drying time; keep the hair dryer at a distance of 25-30 cm from the craft.
 STEP 2
We apply the first layer of acrylic paint, for example, gold. The paint can be applied in several layers with an intermediate drying of 15-40 minutes.
Attention: Acrylic paints are not washed off with water when dried. It is important to immediately, without waiting for drying, wipe the work surface, wash the tool (brush).
 STEP 3
We apply craquelure varnish from the decoupage and craquelure set with a thick layer on top of the paint with a flat synthetic brush. We immediately wash the brush, and leave the varnish to dry for 20-40 minutes. The dried craquelure varnish should be slightly sticky, but not leave marks on the finger.
Tip: Craquelure varnish can be applied in 2 layers, then the cracks in the second layer of paint will be larger.
 STEP 4
A small amount of contrasting acrylic paint of a classic color, for example red, is applied to the palette (a thick sheet of paper or a plastic tray). Dip a piece of foam sponge into the paint, and then sponge the paint onto the ball with light tapping movements. Paint should be applied in one coat. Almost immediately, the upper layer of paint will begin to become cracked, through which the lower layer of paint will be visible, creating the effect of antiquity. Let the paint dry (15-40 minutes). Tools are washed.
Important: the top coat should be classic colors, not metallic shades. The latter have a denser texture, which does not allow the paint to crack under the influence of craquelure varnish.
 STEP 5
Choose your favorite New Year's motive from a paper napkin. The size of the motive should not be larger than the size of the ball itself. Cut a motive or several motifs along the contour with scissors.
 STEP 6
Most paper towels are either two or three layer.For work, only the top layer with a pattern is needed. The remaining layers need to be separated. They will not be needed.
 STEP 7
We apply the cut motif face up to the decorated ball. We apply glue for decoupage with a flat synthetic brush on the ball directly on top of the napkin. We do this carefully in the direction from the center to the edges of the napkin, so as not to tear it. Let the glue dry (15-30 minutes). We immediately wash the brush or put it in a container of water.
 STEP 8
After the paint has dried, you can apply dry sparkles to some areas of the glued pattern. To do this, dip a thin round synthetic brush into the decoupage glue (or acrylic glue) and draw lines with it in those places of the picture where the sparkles should be. We immediately wash the brush. Without letting the glue dry, pour spangles on the spots smeared with glue. Let the glue dry (15-30 minutes). Shake off any excess sparkles with a dry brush or napkin.
 STEP 9
On a palette, a thick sheet of paper or a plastic tray, pour a small amount of glue for decoupage, and then fill in the sparkles and mix. The resulting composition covers the ball or its individual sections. The effect of paint with sparkles is created. Let the glue dry (15-30 minutes).
 STEP 10
We cover one or two layers of glossy acrylic varnish with a flat synthetic brush. This will protect the decor from mechanical damage, as well as prevent glitter from shedding. Let the varnish dry completely. The toy is ready!
Photo: PR
Material prepared by Julia Dekanovand
Share
Pin
Tweet
Send
Share
Send


