Durable, but soft, this case holds its shape well, while protecting the tablet due to two layers of felt.
This case turns out to be quite soft to protect the tablet well from damage, while keeping its shape well thanks to the gasket between its layers. For laying, you can use strong thin cardboard, durable thin plastic or glue the felt layers with non-woven or doubler.
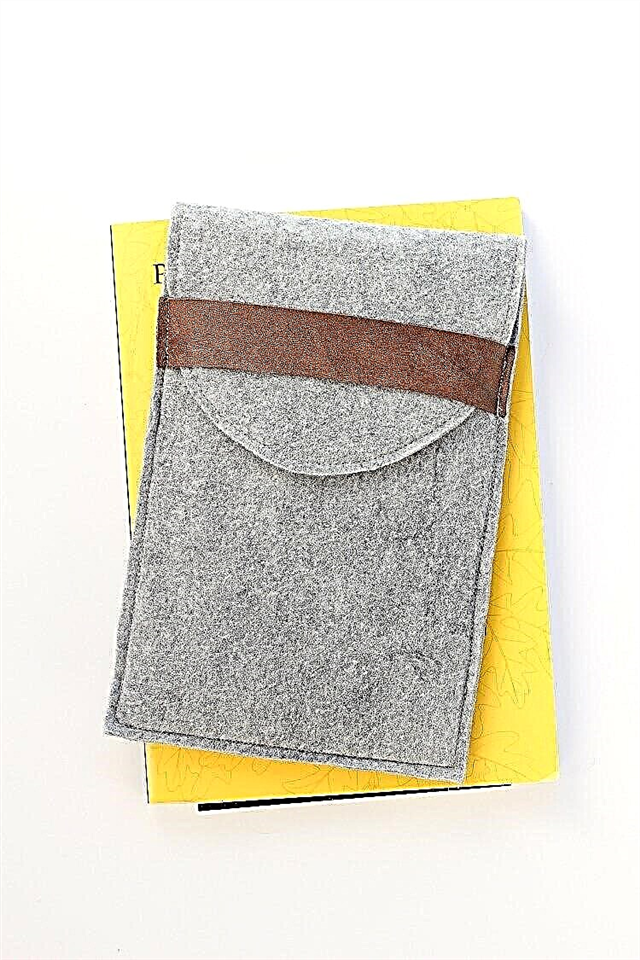
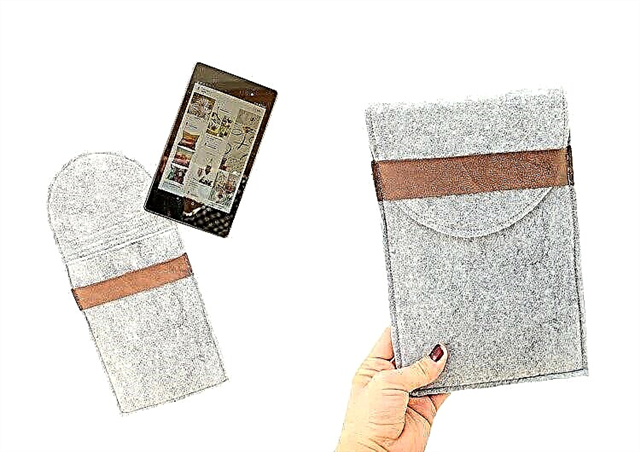
DIY phone case made of felt
You will need:
- paper, pencil and ruler to build patterns;
- felt;
- a strip of leather or suede (rather thick and durable);
- scissors;
- for laying - thin strong cardboard or plastic + glue (in this case glue-spray was used), or - glue interlining or doubler + iron to stick it on;
- sewing machine and thread;
- a needle for leather or an awl and an ordinary thick needle for hand sewing;
- clips (small stationery clips are suitable).
How to sew a case for cards with your own hands: a master class
Step 1
Before you start, make a pattern for the tablet. To do this, put the tablet on paper, circle it with a pencil and add 1 cm on each side. The resulting rectangle is a pattern of the front part of the cover. To pattern the back part with the valve, circle the rectangle of the front part on paper, copying it,and add on top 1/3 of the length.
Step 2
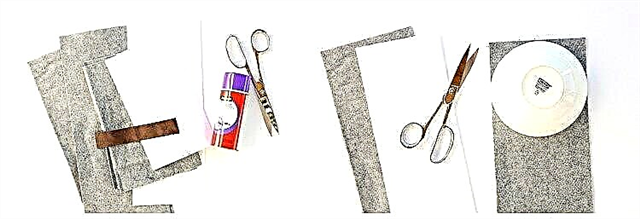
Cut parts from felt. To round off the valve on the back of the case, you can use the saucer as a template. You need 2 parts for the front and back of the case. Also cut the item out of leather. Its length should be equal to the width of the cover, the width is 2-3 cm.
Step 3

Fasten the felt with a gasket. To cut out the gasket parts, reduce the patterns of the front and back parts of the cover by 1 cm on each side. The gasket must be glued between the layers of felt. If you chose plastic or cardboard, use glue. In the case of doubler or non-woven - iron. After gluing the gasket between the layers of felt, wait for the glue to dry and stitch each part, departing from the edge by 1 cm. If necessary, trim the edges with scissors.
Step 4
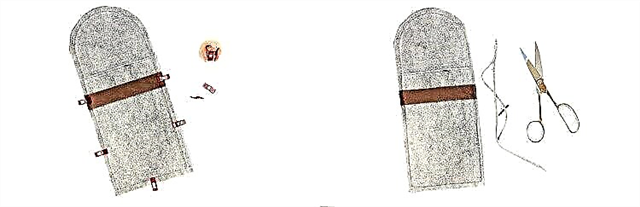
Connect the front and back of the case. To prevent them from moving, fasten the edges in several places with clamps. Sew the parts on the machine, trying to sew a stitch along the existing seam. After sew a strip of leather for a fastener. Do it manually using a special skin needle (it is specially pointed and passes well through a layer of dense genuine leather). If there is no skin needle, first pierce the skin with an awl, then sew with a regular needle.
Done!
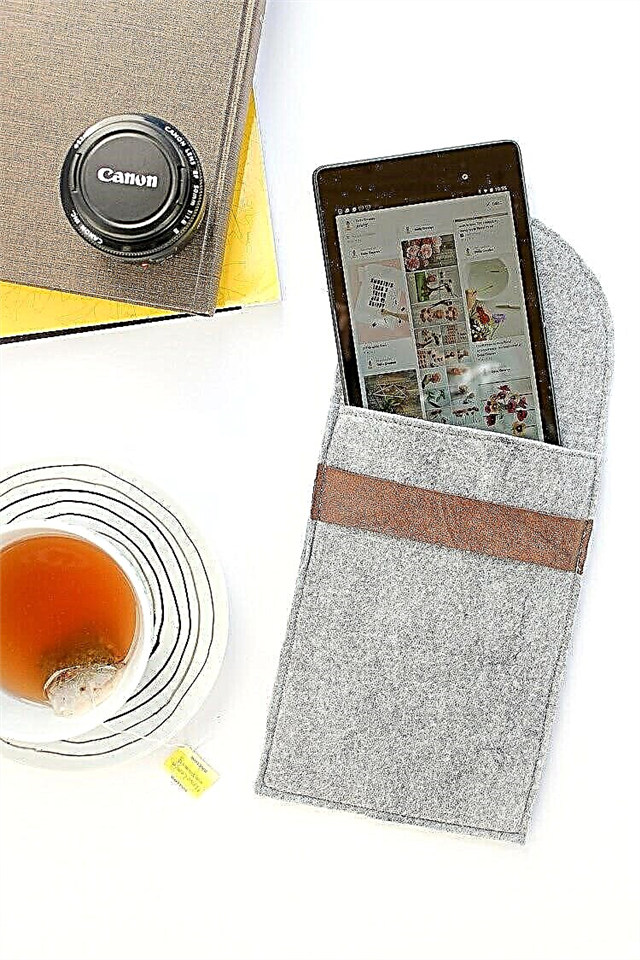
Photo and source: deliacreates.com